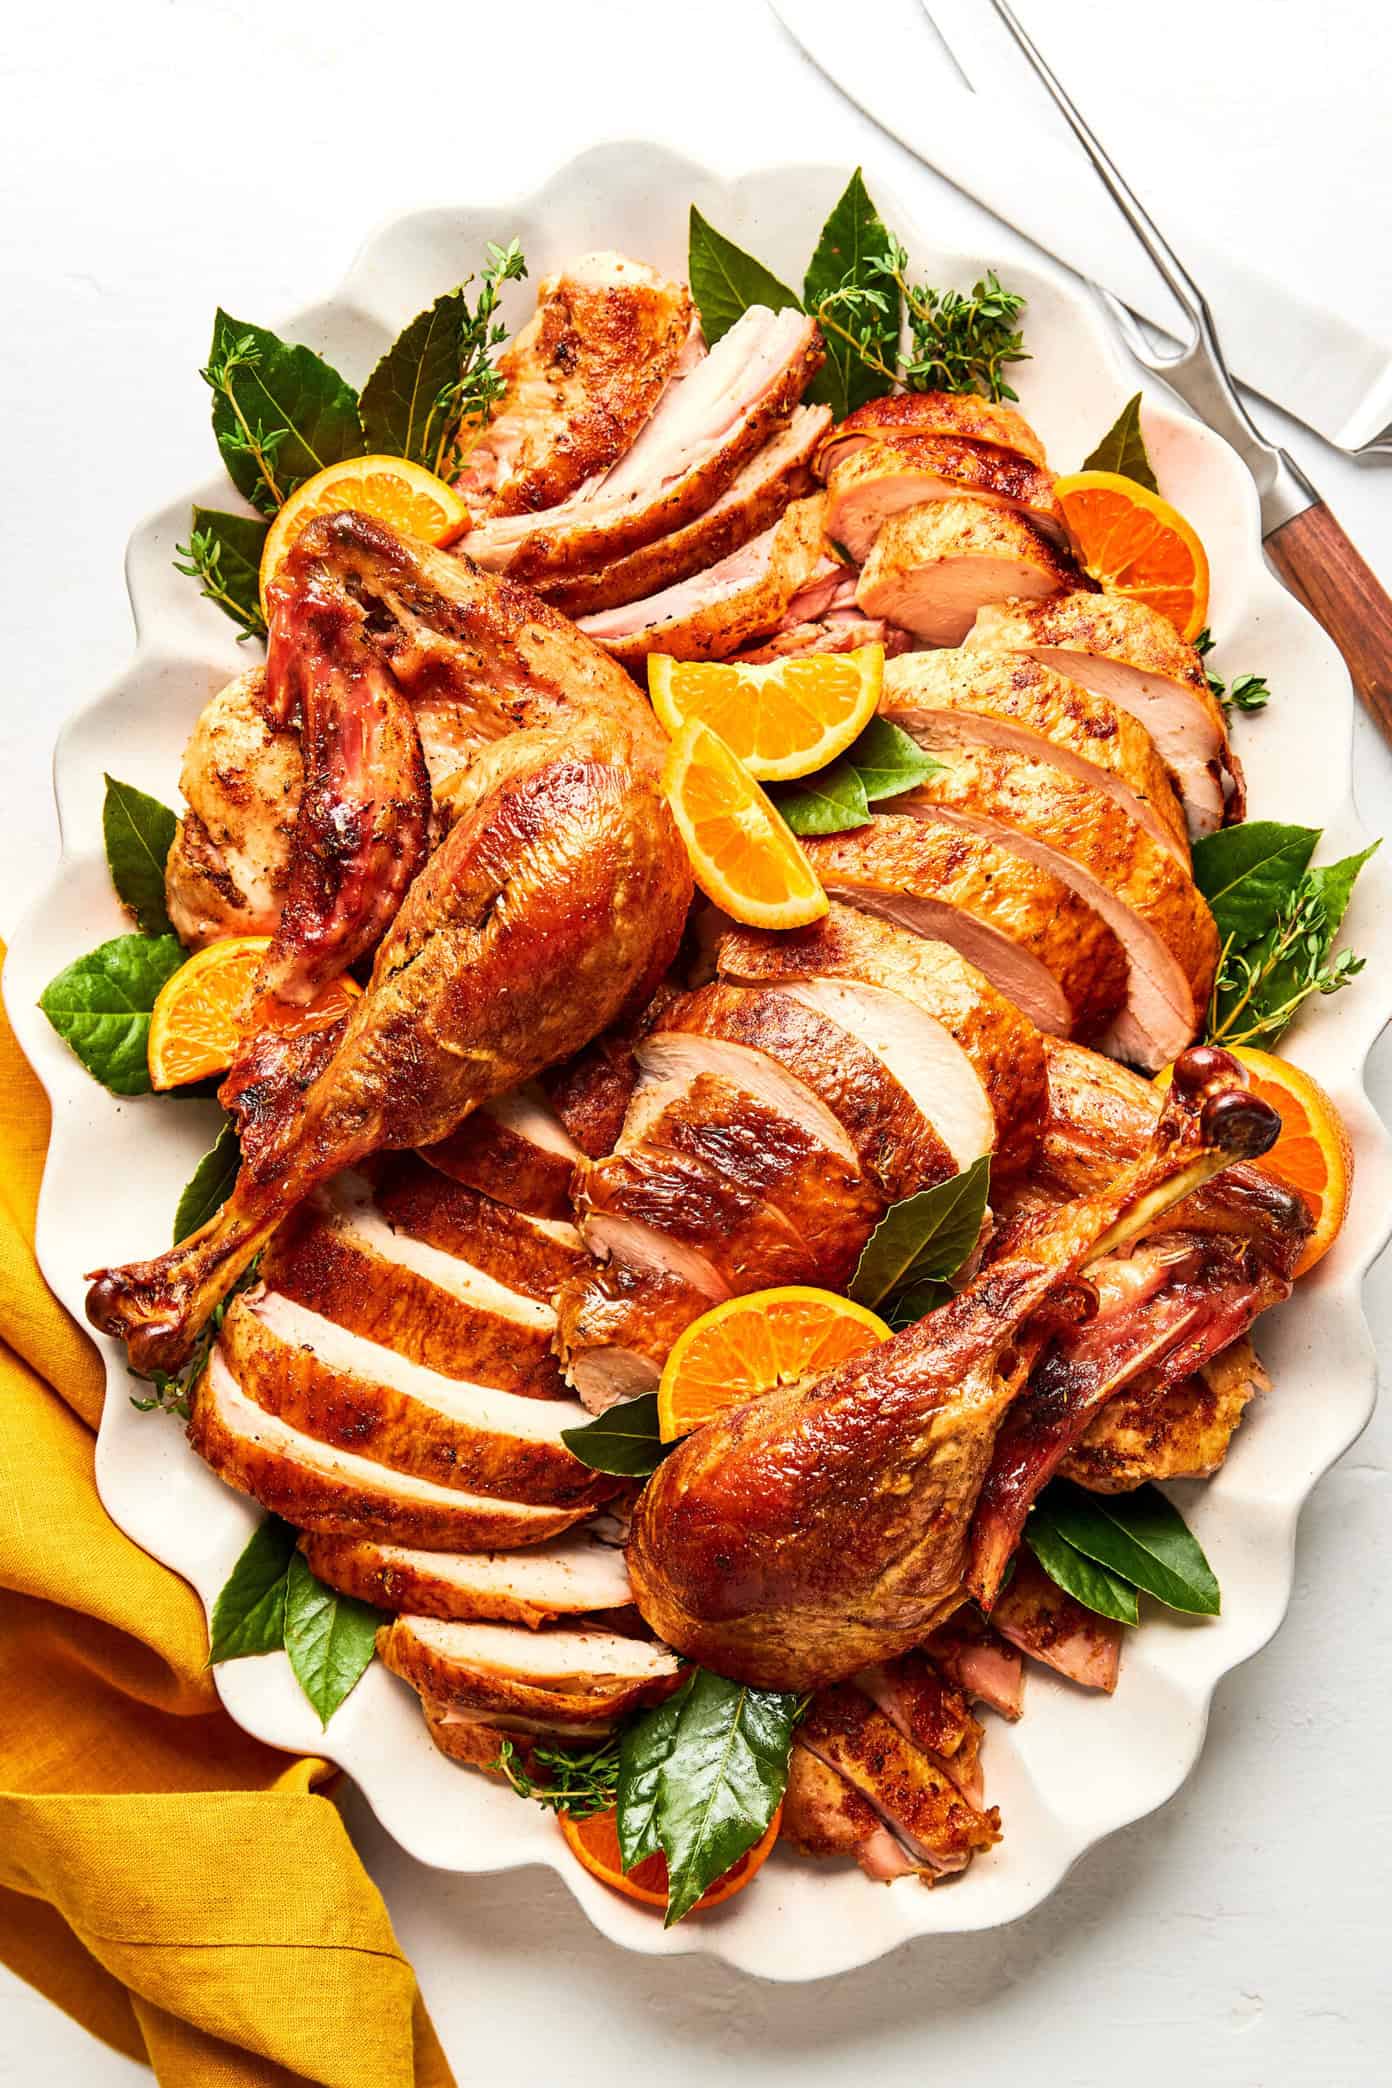
Simple Dry Brine: The Secret to Succulent & Crispy Roasted Turkey
Thanksgiving, Christmas, or any grand family gathering often revolves around one magnificent centerpiece: the roasted turkey. For many home cooks, the thought of delivering a perfectly cooked bird – moist on the inside, gloriously crisp on the outside – can be daunting. Visions of dry, bland meat or soggy skin often haunt holiday meal preparations. But what if there was a simple, foolproof method to guarantee a show-stopping turkey every single time? The secret, dear reader, lies in mastering **how to dry brine and roast a turkey**. Forget complicated techniques or messy, space-consuming methods; dry brining is a game-changer that promises the best turkey you'll ever eat.
The Dry Brine Difference: Unleashing Flavor and Moisture
Before we dive into the "how-to," let's understand the magic behind dry brining. Often referred to simply as "salting," dry brining involves rubbing your turkey down with salt and letting it rest in the refrigerator for an extended period, typically 24 to 72 hours, before roasting. But what exactly is happening during this seemingly simple process?
The science is fascinating. When salt is applied to the surface of the turkey, it initially draws moisture out of the meat through osmosis. This concentrated salty liquid then begins to break down muscle proteins. Over time, the changed protein structure allows the meat to reabsorb its *own* flavorful, salty liquid. This internal re-distribution of moisture results in incredibly juicy, tender, and seasoned-from-within meat. It’s a self-basting marvel!
This method stands in stark contrast to its wetter cousin, wet brining. Wet brining involves submerging the turkey in a large container filled with a heated, then cooled, salt-water solution. While it also prevents the meat from drying out, wet brining introduces additional water into the turkey. This can sometimes dilute the natural turkey flavor and can lead to a less crispy skin, as the added moisture needs to evaporate during cooking. Plus, handling a giant bird sloshing around in a brine solution often requires an extra-large cooler or a dedicated brining bag, taking up precious refrigerator real estate and creating a potential for spills. For a deeper dive into why dry brining triumphs over its wet counterpart, check out our article on
Dry Brine vs. Wet Brine: Why Salting Your Turkey is Superior.
Why Dry Brine Reigns Supreme for Your Holiday Bird
When considering the best approach for your turkey, dry brining offers a compelling list of advantages:
*
Unrivaled Juiciness: By reabsorbing its own seasoned juices, the meat becomes inherently more succulent and flavorful. You won't find a dry breast or thigh anywhere on a properly dry-brined bird.
*
Crispy, Golden Skin: One of the greatest benefits of dry brining is that it allows you to air-dry the turkey in the refrigerator. Leaving the bird uncovered for the brining period helps to dehydrate the skin, setting the stage for an unbelievably crispy, beautifully bronzed exterior when roasted.
*
Concentrated Flavor: Unlike wet brining, which can dilute flavor, dry brining concentrates the turkey's natural taste, enhancing it with a perfect level of seasoning throughout.
*
Less Mess, More Space: No giant buckets of liquid, no sloshing, and no frantic search for fridge space. Dry brining simply requires placing the salted turkey on a rack in a roasting pan or a tray, making it much more manageable.
*
Simplicity Itself: Despite its profound effects, the actual process of dry brining is incredibly straightforward, requiring minimal ingredients and fuss.
Mastering the Simple Dry Brine: Step-by-Step Guide
Ready to revolutionize your turkey game? Here’s precisely **how to dry brine and roast a turkey** with outstanding results.
1. Choose Your Turkey Wisely
Start with a fresh or fully thawed turkey. Ensure it hasn't been pre-brined or injected with a sodium solution, as this could lead to an overly salty bird. Look for "natural" or "young" turkeys. Remove the neck and giblets from the cavity. Pat the turkey thoroughly dry with paper towels inside and out.
2. The Power of Kosher Salt
The choice of salt is crucial. Always opt for
kosher salt, not table salt. Kosher salt has larger, coarser granules that make it easier to handle and less likely to over-salt due to its lower density compared to fine table salt. Avoid iodized table salt, which can impart an off-flavor.
3. How Much Salt? Finding the Sweet Spot
There are a couple of approaches to salt quantity. Some recipes suggest 1 teaspoon of kosher salt per pound of turkey. Others, like the method we prefer for simplicity and excellent results, recommend a fixed amount for common turkey sizes. For a 12 to 15-pound turkey, about 3 tablespoons of kosher salt is ideal. This amount ensures deep seasoning without the need for rinsing the bird before roasting, a practice that can spread bacteria in your kitchen. This approach guarantees succulent, well-seasoned meat without being excessively salty.
4. Application: Rubbing it In
Generously rub the kosher salt all over the exterior of the turkey, including under the skin of the breast and thighs. Don't forget the cavity! Distribute the salt as evenly as possible. You can place the turkey in a large brining bag or simply set it on a wire rack over a baking sheet or in a roasting pan. The rack is key for allowing air circulation.
5. The Resting Period: Let the Magic Happen
Place the turkey, uncovered, in the refrigerator. This "naked" exposure to the cold air is essential for drying out the skin, which contributes to that coveted crispiness. Allow it to rest for 24 to 72 hours.
*
24 hours: Good results, noticeable improvement.
*
48 hours: Excellent, deeply seasoned, and significantly drier skin.
*
72 hours: Optimal results for maximum juiciness and crispiest skin.
6. Pre-Roasting Prep: The Final Touches
On roasting day, remove the turkey from the refrigerator. You'll notice the skin might look slightly papery and darker – this is exactly what you want! There's no need to rinse off the salt. Simply pat the turkey dry one last time with paper towels. You can optionally brush the entire bird with melted butter or olive oil. This aids in browning and further enhances skin crispiness. Lightly season the exterior with freshly ground black pepper and any additional herbs you prefer (rosemary, thyme, sage), but go easy on the salt – the dry brine has already done the heavy lifting. For more detailed insights into achieving that perfect texture, refer to our guide on
How to Dry Brine Turkey: Guaranteed Juicy Meat & Crispy Skin.
Roasting Your Perfectly Brined Turkey
With your turkey perfectly prepped, the roasting process becomes much simpler and more predictable.
1.
Preheat Oven & Roasting Pan: Preheat your oven to a high temperature, around 425-450°F (220-230°C). If you have a V-rack in your roasting pan, place the turkey on it, breast-side up.
2.
Initial High Heat: Start the turkey at the high temperature for the first 30-45 minutes. This blast of heat helps to rapidly crisp the skin and jump-start the cooking process.
3.
Lower Temperature: After the initial searing, reduce the oven temperature to 325°F (160°C). Continue roasting until the internal temperature reaches 165°F (74°C) in the thickest part of the thigh (without touching bone) and 160°F (71°C) in the thickest part of the breast. The carryover cooking will bring the breast up to 165°F while resting.
4.
Basting (Optional): Many dry brine enthusiasts skip basting entirely, as the dry brine helps keep the meat moist and constant opening of the oven door can lower the temperature. If you prefer to baste, do so sparingly and quickly, perhaps once or twice throughout the cooking process.
5.
Resting is Crucial: Once cooked, remove the turkey from the oven and tent it loosely with foil. Let it rest for at least 20-30 minutes (for smaller birds) or up to 45-60 minutes (for larger birds) before carving. This allows the juices to redistribute throughout the meat, ensuring every slice is incredibly moist.
Conclusion
Dry brining is not just a technique; it's a revelation that transforms ordinary turkey into an extraordinary culinary experience. By understanding **how to dry brine and roast a turkey**, you're empowering yourself with the secret to perfectly succulent meat, shatteringly crispy skin, and concentrated, mouth-watering flavor. This simple, hands-off method eliminates the stress and mess of traditional brining, leaving you with more time to enjoy the company of your guests and the undeniable satisfaction of serving the best turkey they've ever tasted. This holiday season, embrace the dry brine, and prepare for a chorus of compliments and requests for seconds!