Dry Brine vs. Wet Brine: Why Salting Your Turkey is Superior
As the holiday season approaches, the quest for the perfect roast turkey begins anew for countless home cooks. For many, Thanksgiving isn't just a meal; it's an event, a culinary challenge centered around that magnificent bird. But what truly separates a good turkey from an unforgettable one? The secret lies in what you do before it ever sees the inside of an oven. While various methods promise a succulent feast, the debate often boils down to two popular techniques: wet brining and dry brining. We're here to tell you why salting your turkey, or dry brining, is not just a preference, but a superior strategy that consistently delivers the crispiest skin and the most exquisitely juicy, flavorful meat.
If you’ve ever wondered how to dry brine and roast a turkey for guaranteed success, you've come to the right place. Forget dry, bland poultry; this comprehensive guide will equip you with the knowledge to create a show-stopping centerpiece that will have your guests clamoring for seconds, every single time.
Understanding the Brine Battle: Dry vs. Wet
Both wet brining and dry brining aim to achieve the same goal: preventing your turkey from drying out during the long roasting process. However, their approaches and outcomes differ significantly.
What is Wet Brining?
Wet brining is perhaps the more traditionally recognized method. It involves submerging the entire turkey in a large container filled with a heated, then cooled, salt-water solution. Often, this solution is infused with aromatic ingredients like herbs, spices, and even sugar for added flavor. The turkey typically soaks in this liquid for 12-24 hours before roasting.
The science behind wet brining is osmosis. The salt in the solution helps the turkey absorb additional liquid, plumping up the meat cells and theoretically making it more resistant to drying out. While it can produce a juicy bird, wet brining comes with its own set of challenges:
- Space Constraints: Finding a container large enough for a whole turkey and gallons of brine can be a logistical nightmare, especially in a crowded holiday refrigerator.
- Mess and Safety: Handling a large, raw bird sloshing in saltwater is cumbersome and carries a higher risk of cross-contamination.
- Diluted Flavor: While the meat absorbs liquid, it's primarily water, which can dilute the turkey's natural, rich flavor profile.
- Soggy Skin: The absorbed moisture often makes it harder to achieve truly crispy skin, as the surface has to dry out before it can crisp up.
What is Dry Brining (Salting)?
Dry brining, also known simply as salting, is a far more elegant and effective technique. It involves generously rubbing the turkey's surface with salt and then allowing it to rest uncovered in the refrigerator for 24 to 72 hours before roasting. This method is surprisingly simple yet incredibly powerful, transforming your turkey from the inside out.
The magic of dry brining unfolds in a multi-stage process:
- Initial Moisture Release: The salt on the surface of the turkey draws out moisture from the meat through osmosis.
- Salt Dissolution & Reabsorption: This extracted moisture then dissolves the salt, creating a concentrated brine right on the turkey's surface.
- Protein Transformation: The salt penetrates the meat, breaking down muscle proteins. This structural change allows the muscle fibers to retain more moisture, preventing them from seizing up and becoming tough during cooking.
- Flavor Infusion: The turkey then reabsorbs its *own* flavorful, salty liquid back into the meat, deeply seasoning it from within. This is key to superior flavor compared to wet brining, which can introduce external, less flavorful liquids.
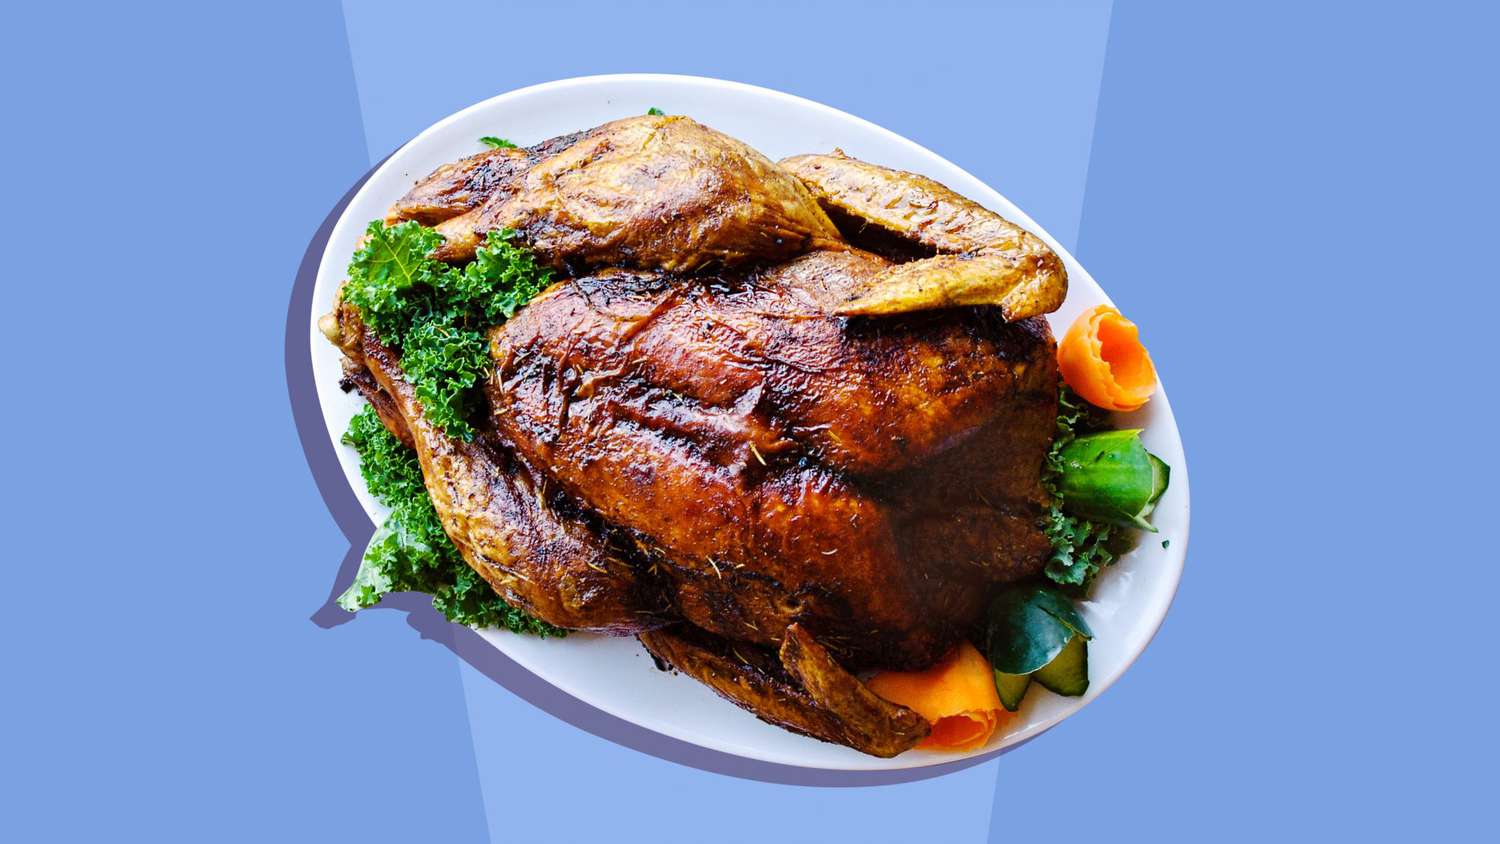
The result? Meat that is incredibly juicy, tender, and seasoned throughout, coupled with remarkably crispy, golden-brown skin. For a detailed exploration of this method, read more about How to Dry Brine Turkey: Guaranteed Juicy Meat & Crispy Skin.
Why Dry Brining Reigns Supreme
While both methods prevent dryness, dry brining offers distinct advantages that make it the superior choice for your holiday bird:
- Space Efficiency: No need for a gigantic bucket of brine taking up valuable refrigerator real estate. Your turkey simply rests on a rack in a roasting pan, making it far more manageable.
- Unparalleled Crispy Skin: By resting uncovered in the fridge, the turkey's skin air-dries. This removal of surface moisture is the absolute secret to achieving that coveted, shattering crispy skin that is simply unattainable with a wet-brined bird.
- Effortless Handling: Say goodbye to wrestling with a slippery, brine-soaked turkey. A dry-brined bird is much easier to manage, reducing mess and stress in the kitchen.
- Intensified Natural Flavor: Because the turkey reabsorbs its own juices, the natural flavors are concentrated and enhanced, rather than diluted. Every bite tastes distinctly of delicious turkey.
- Guaranteed Juiciness: The protein-altering power of salt ensures the meat stays incredibly moist and tender, even if slightly overcooked.
For more insights into the simplicity and effectiveness of this technique, check out Simple Dry Brine: The Secret to Succulent & Crispy Roasted Turkey.
Your Guide to How to Dry Brine and Roast a Turkey
Ready to experience the best turkey you've ever made? Here's your step-by-step guide on how to dry brine and roast a turkey for maximum flavor and texture.
1. Choose the Right Salt
Always use kosher salt. Its larger, coarser granules mean it's less dense than table salt by volume, making it easier to distribute evenly without over-salting. Table salt, with its finer crystals and often added anti-caking agents, can make your turkey excessively salty. Do not substitute table salt for kosher salt in dry brining recipes.
2. Determine the Perfect Salt Ratio
While some recipes suggest 1 teaspoon of salt per pound, we advocate for a slightly less aggressive approach that eliminates the need to rinse the bird (a practice that can spread bacteria in your kitchen). For a 12 to 15-pound turkey, 3 tablespoons of kosher salt is ample to achieve a perfectly seasoned and juicy result without being overly salty.
3. Apply the Salt Evenly
Start by patting your turkey thoroughly dry with paper towels. Then, sprinkle the kosher salt evenly over the entire surface of the turkey, including under the wings and legs, and inside the cavity. Don't forget to get some under the skin, especially over the breast meat. Use your hands to gently rub it in, ensuring good coverage. You want a light, even coating, not a thick crust.
4. The Dry Brining Process (24-72 Hours)
Place the salted turkey, uncovered, on a rack set inside a roasting pan. Transfer it to the refrigerator. The ideal brining time is 24 to 72 hours. The longer it brines, the deeper the salt penetrates, leading to more flavorful and tender meat. Resting it uncovered is crucial for allowing the skin to air dry, which directly contributes to its crispiness. If you're concerned about other foods in your fridge, you can loosely tent it with plastic wrap after 24 hours, but aim for at least some uncovered time.
5. Prepare for Roasting
On Thanksgiving morning (or your designated cooking day), remove the turkey from the refrigerator. There's no need to rinse it. The salt will have fully absorbed, and the surface will likely feel slightly tacky – a sign of perfectly air-dried skin. Pat it dry one last time if there are any lingering moist spots. Now, it's ready for any additional seasonings you desire – a light brush of melted butter or olive oil, a sprinkle of black pepper, or a compound butter under the skin. Avoid adding more salt, as the turkey is already perfectly seasoned.
6. Roasting Your Masterpiece
Preheat your oven to a high temperature, typically 425-450°F (220-230°C). Place the turkey on the rack in the roasting pan. Starting at a high temperature helps to crisp the skin quickly. After 30 minutes, reduce the oven temperature to 325°F (160°C) and continue roasting until the turkey reaches the correct internal temperature. For a 12-pound bird, this can be under 2 hours, but cooking times vary. Always use a reliable meat thermometer inserted into the thickest part of the thigh (without touching bone) to ensure it reaches 165°F (74°C).
Pro Tip: Don't forget to rest your turkey! Once it's out of the oven, tent it loosely with foil and let it rest for at least 20-30 minutes before carving. This allows the juices to redistribute throughout the meat, ensuring every slice is incredibly moist.
Conclusion
The journey to the perfect holiday turkey doesn't have to be fraught with stress or uncertainty. By embracing the simple, elegant technique of dry brining, you unlock a world of flavor and texture that wet brining simply can't match. From the incredibly crispy skin to the deeply seasoned, succulently juicy meat, a dry-brined turkey is a culinary triumph. So, this year, skip the messy buckets and embrace the power of salt. Follow our guide on how to dry brine and roast a turkey, and prepare to impress your guests with a bird that truly is superior in every way.
